Finished Labyrinth Cosplay @ The Groovy Geek Gathering

Standard

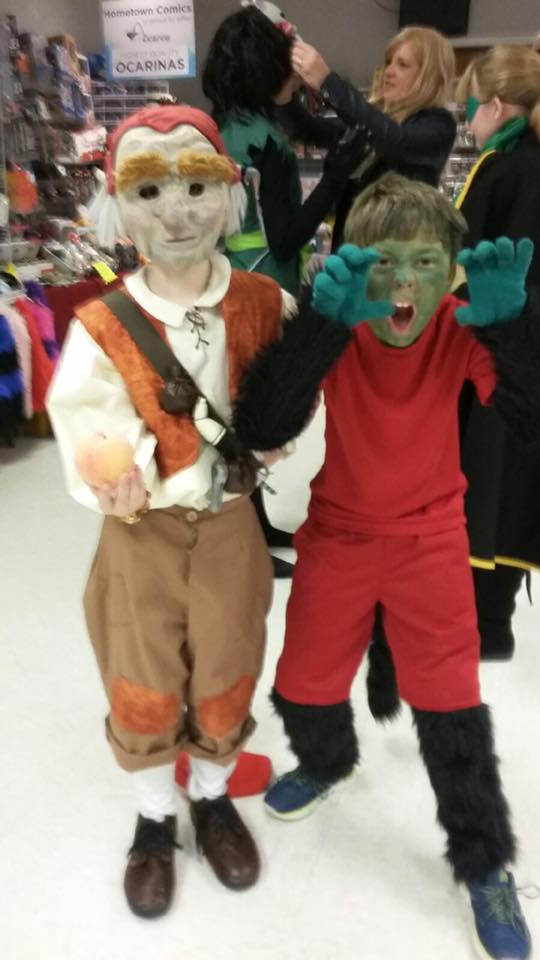
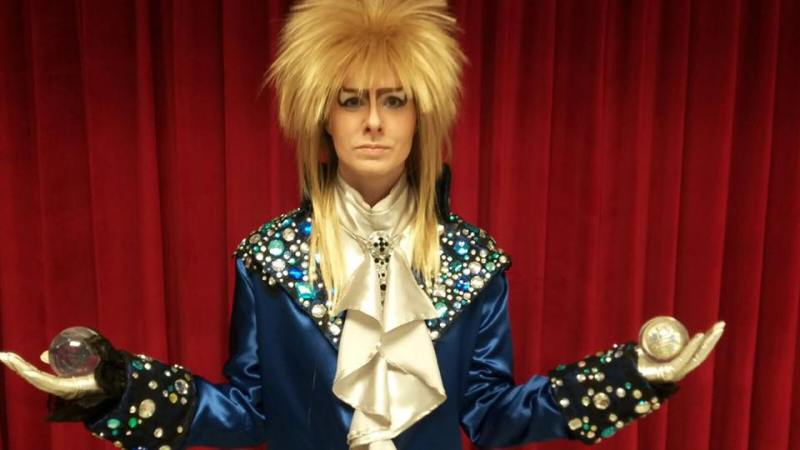
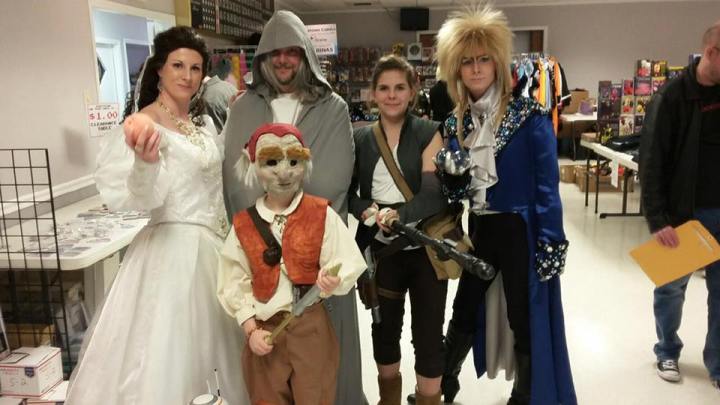
Even though we were starching sleeves and gluing on jewels the night before, we finished on time for the Groovy Geek Gathering. Our costumes were a big hit. I can’t wait to take it to an Indy Con.

We had a good time meeting up with other friends in costume and purchasing from vendors. Rylee got an Ash hat for his next cosplay and Kylie got a Supernatural vanity plate. My son even learned how to play love letters.

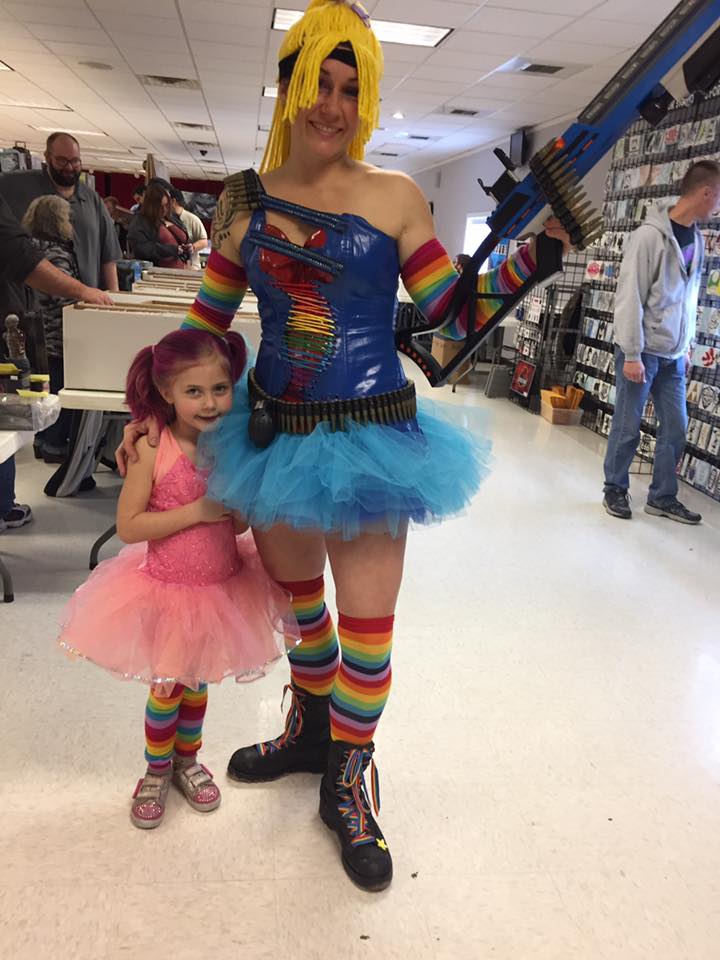
Here we are with some of our friends who also cosplayed at the event as Rambo Bright, Star Wars and Young Justice characters.

17362013_10107859815064538_1645110317745975409_nrainbowbright17352150_10107859815164338_706668159441337532_n17358612_10154946556196211_6660076971216026477_o

I think they all did a fabulous job on their costumes. Here are some of my favorite pics from the con.

And a few where we were just goofing around. That dress barely fit in the car.

As you all know, I’ve been practicing contact juggling for this event. Here are a few pics of me doing the tricks and a link to the video on Facebook if it will work.

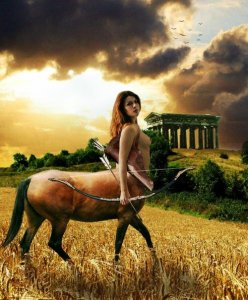
Please watch and let me know what you think. Now I promise, no more cosplay post for awhile, except for the final installation of my centaur DIY that I promised some of you I’d post soon. Sorry for the delay.

Time is Short: Such a Pity

Standard

I’m starting to worry we won’t get finished on time, but I always feel this way before a con. We got a lot done with week, and it’s all finally starting to come together.

For starters, I’m sorry I haven’t shared a lot of pictures of my sister’s dress. We just haven’t had time. It’s so pretty. We compared a lot of fabric before choosing the three we did. We really wanted to be authentic to the movie. After playing tv pause to get a good look at it, we were dismayed to find that the dress, down to the sleeves, is an iridescent, Barbie nightmare.

We did use iridescent organza; however, we toned it down with a lace and sparkly organza. You still see the multiple tones, but it makes it look more like an elegant ballgown instead of a Barbie birthday dress.

beads

The beads were hand stitched by my sister, using the same beads I used to make the necklace so it will all tie in. Needless to say, this was very time consuming.

Speaking of time consuming, I started glueing the jewels to my jacket. I also glued jewels to my  brooch.


We also got a lot of work done on the Hoggle mask. I’m hoping to have it ready to paint by the weekend.

hoggle mask

As always, let me know what you think. Hopefully next week I’ll have more pics of the dress.

Cosplay Progress: Sewing Party

Standard

This week was hectic, but in a good way.

So my son’s costume is almost finished. This week I finished the pants and sis started some of his accessories.

I also finished my silver, ruffle-necked shirt. I sewed dozens of buttons down the back before realizing they made snaps in the same style. Ughh! I also started the shiny silver, jewel encrusted brooch that pins to the collar.


Over the weekend, we had a sewing day with my friends, who are also working on a family cosplay. They are all going as DC characters. It was crazy and fun. We set up a long table in the kitchen so we could use two sewing machines at once. In the family room we cut patterns and fabric, and measured everybody. We had pizza and drinks (of the adult variety) and sewed like crazy. After the party, there was faux fur and fabric pins everywhere. It was hectic, especially since my friend Shelly and I are the only ones who sew. We taught her daughters how to cut patterns, so this was a great learning experience for them. I’m hoping to have another get together in a week or so. Here are some pictures from the party of my stitch’n bitches. I wish I had more, but I was too busy sewing.

Labyrinth Cosplay:Week Three Progress

Standard

This was a week of ALMOST. I almost finished my shiny Bowie shirt.

It looks finished, but I still need to sew the buttons in the back. I found some really pretty buttons from JoAnns but they didn’t have enough in stock, so I have to wait for more to come in. At least the sewing part is done. I’m really happy with the way the shirt turned out. I think my sewing level might have increased from beginner to intermediate. I still can’t master zippers, but there’s always an alternative to a zipper.

I almost finished Rylee’s Hoggle pants. I just have to sew the patches and a button on them.

Other than that, my sis bought the clay to make Hoggle’s accessories. She hasn’t been feeling well, so that is as far as she got.

We also looked at fabric again. Monday, I’m going to buy the fabric for the jacket.

My goal is to finish the pants Monday and start on the jacket and finally cut the pattern for Sarah’s dress. There’s still so much to get done. I just realized I need to make the brooch that he pins on his ruffled shirt. I saw one online, but the colors of the beads are wrong and it’s 50 dollars. I could probably make it for 10-20. So another thing to add to the to-do list.

Stay tuned for next week, when hopefully, I have some more photos to share.

Labyrinth Cosplay: Week One 1/2

Standard

I don’t usually dig the 1/2 thing, like Lion King 1/2, but this is technically not week one since I started a little bit before last week, so roll with it.

So what have we accomplished so far.

Goblin King


jareththegoblinkingI found the fabric for my shirt. It’s so shiny. I’m excited/not excited to start working on that. Luckily, it doesn’t have to be perfect because only the collar shows. That’s this week’s project. Other than that, my wig came in. I have mixed feelings. It’s a little dark. But it seems like the wigs either come in too dark or too light. What I’m more annoyed by is the length. It’s way too long on top–another common problem with Jareth wigs. I’ll probably have to take it in and have it trimmed.

My third crystal ball came in, so now I’m going to start practicing some new tricks.

Sarah

On a positive note, all of the jewelry pieces for Sarah are done. I’m so excited about this. I like to consider myself artsy, but jewelry making was just never something I excelled at. Cosplay has given me a chance to really test myself. I re-created the earrings, bracelet, and the necklace that Sarah wears in the film. The necklace was a real challenge. My sister wanted to order it, but I just wasn’t happy with the ones online. For 70 dollars, they really skimp out on the beads and they are more “inspired” by as opposed to being replicas. For probably the total cost of $20, my sister now has a replica that I think is pretty spot on. Let me know if you find one online that is more of an exact replica. I know that’s pretty egotistical, but I’m a stickler for detail.

Hoggle

I cut the fabric for Hoggle’s vest. I had a hard time finding a fabric that has multiple colors. I don’t like painting fabric. I think this one looks great. I also almost finished his shirt. All i have to do is ad the grommets and ties at the neck.

On another note, my sister purchased a baby doll for Toby and ordered him a striped onesie. It’s coming along. I’m hoping to have the Jareth shirt done this week and maybe the vest. More next week.


Be the Centaur of Attention (Part One)

Standard

If you want to be the center of attention at a con or costume party, dress as a centaur.

As many of you know, I built a centaur costume for my role in the Ole Olsen production of The Lion, the Wtich, and the Wardrobe.

This was going to be one very long post (a very, very, very long post), but I’ve recently decided to break it up into several smaller post outlining–in detail and with pictures–how to create a walking centaur costume from start to finish.

I recently had someone contact me wanting help creating a costume. There’s so much advice and information to give, it only makes sense to start at the beginning.

43836098

Create your Concept

The first thing I did was what anyone would do … consult Google of course to see how other people mastered this challenging costume.

And boy was I not disappointed … in the number of pictures of finished projects, that is. What was lacking was a detailed how-to instruction. No where in the infinite interweb, could I find a complete guide, not even on YouTube.

When Google and YouTube failed me, I read forums and watched videos to develop my concept.

My DIY project just became a FIOY (Figure it out yourself) project.

It is my personal theory that cosplayers fall into two categories:Those who like to keep their ideas and techniques a secret and those who like to teach others.

Apparently I will be the first person to share a step by step tutorial from beginning to end.

From what I could tell, other people used chicken wire, metal or PVC pipe frames, and hinges for the joints. They then crisscrossed wires from the horse legs to their own legs.

All of their ideas seemed to work …but

9516d67c2cbd432d62818c07745f255d9c1ba75f810303f26a96b69ef32a0cde


After trial and error–many, many trials and errors, I decided against chicken wire and attaching the wires to my legs, or using drills or hinges of any kind.

By creating my own design, what I ended up with is a lightweight, walking centaur costume that is fully washable that can be assembled with only one step requiring another person.

What You’ll Need

  • PVC or CPVC piping. I don’t know what the difference is. I just asked the guy at Lowes which one cuts easier. You will only need about two pipes. 1 inch or 3/4 inch pipe.
  • A pipe cutter or hacksaw. I got a cutter for $10 I like the cutter because you can cut them in the house without messing up tables or floors. Got it at Lowes.

IMG_22631

  • PVC pipe joints, tees, elbows, and bushings (I’ve included photos of which ones) You’ll need 4 T’s, two larger T’s, 8 elbows (2 90 degrees, 4 45 degrees), 2 caps, and 2 bushings.

PVC-Fittings-TZZX002-

  • PVC glue (cement glue)
  • Marker (for marketing–duh)
  • Measuring tape
  • 1 inch poly foam. I got a big roll at Hobby Lobby
  • Fabric for body. roughly a yard to a yard and a half or two, depending on how long. (I recommend a spandex, rylon, polyester variety–something that stretches four ways if you want it to move naturally like skin) Go to Jo-Ann Fabrics
  • Material for a harness (I used the material you find on backpack straps). I bought several yards.
  • Black faux leather (for hooves)
  • Panty hose or tights (not for your legs. doesn’t matter what color)
  • Parachute buckles and strap adjusters
  • Rubber chair tips
  • Faux fur
  • Knife
  • Clear tube (optional)
  • Metal wire (optional)
  • Wire cutters (if you use the wire)
  • Fishing wire (10 or 15 pounds)
  • Fake hair or wig
  • Stuffing
  • Batting (optional)
  • Tylenol or Aleve. I really like Aleve for headaches
  • Alcohol (don’t mix with the pain meds)
  • Music or show to play in the background (the longer the better because this could take time)
  • Bandaids for boo boos

boo_boos__eh__by_xxask_mr_chairxx-d5rdk0p

Make sure you have a large area to build this. Remember, you’re making the butt of a horse. You’ll look like a weirdo, so I recommend making it outside where your neighbors can see. Weirding out neighbors will make the project more fun. Also you won’t have to worry about getitng marker, glue, or cuts on your nice floor, carpet, or other surfaces.

Now that you have your supplies, let’s go ahead with the next step.

Measuring

I can’t just give you measurements because how long you make it or how tall depends on your body.

Have you ever been told, measure twice, cut once? Take this advice.

First I measured from where the frame would rest on my lower back to my feet (if you’ll be wearing highheels or platforms for hooves, don’t forget to factor that in. Measure how long you want it and how wide. Make it thinner and shorter than you want the finished project to be. This is only the skeleton. Remember you’ll be adding height and thickness with your foam and stuffing.  I made it waste high so the straps would come around my waste like a seatbelt.


Building the Frame

Now you are ready to start making cuts in your PVC pipe. Measure and mark and then just cut.


This is the basic structure for the body.

After I laid them out, I attached the pieces with the fittings. DO NOT GLUE.

The section in the middle is for support–also to hold the foam in place (we’ll cover that more later).

Next I cut out the legs.

To make the legs, I drew an outline of the legs and cut the pieces so that when they were jointed, they would make a shape like that of a horse.

Fit all the pieces into the fittings and do a trial walk. DO NOT GLUE.

As you can see, the front of the skeleton is held together with 90 degree elbows while the back has T’s. This is so you can attach the legs. I’m not sure if you can see in the pictures, but the big T’s are for the legs. This is how I created a joint so the legs move back and forth. Because the big T’s are larger, They fit over the little T’s. I put a piece of pipe through to connect them and put a cap on the end so it doesn’t fall off. What I like about the way I did this is that it requires no screws or drills or hinges. If for some reason, the costume breaks, it is fixable. If you use a hinge or screws, once it breaks, it’s harder to fix. The picture on the end shows the bushing that you attach to the big T so that the fitting will hold the smaller PVC pipe (that way you only have to use one size pipe).

I hope this helps you get started. The next post will show you how I sculpted my costume using foam and stuffing.

If any of these steps are confusing, or if you  need a deeper explanation, please contact me in comments below or on Facebook or Twitter.

Stay tuned.
I’m going to build a butt

Standard

For those of you who don’t already know, I was cast as the Centaur in The Lion, the Witch & the Wardrobe.

I’m sure you all know what a centaur is, but for those of you who don’t …

let_me_explain_princess_bride

A centaur is a mythological creature that essentially has the head, arms, and torso of a human attached to the torso of a horse.

Let’s see . . . I already have the torso and arms of a human, but I don’t have horsey parts, which  means . . .

I have to build a butt–a horse butt.

I’m starting to suspect that this casting decision was made more for my cosplaying abilities rather than my actual acting talents.

(and with the lines the centaur has, it’s going to be hard to show off my acting abilities, so this costume is going to rock)

Most people would be daunted if given the task of creating a centaur costume.

luke_whining1

On the contrary. It’s actually quite doable, even without CGI. So when I was offered the role of centaur I said

CHALLENGE ACCEPTED

And where did I go to research concepts for my costume–why, the internet of course.

Female_Centaur___ centaur-on-the-hill at-avrat-silah_522556 centaur_huntress_by_janiceduke-d5grw9q Centaur_Danaan

Kim-Kardashian-is-seen-in-Los-Angeles-California

Oops, sorry, that’s not a centaur. That’s Kim Kardashian. I guess I could just sit on my ass until my booty is big enough o glue a tail on.

I’m sure you’re all familiar with this guy

Centaur_Narnia

He pops up a lot if you Google centaur. His name is impossible to pronounce and equally challenging to spell, so I’m just going to call him that cool, muscled guy from Narnia.

For those of you who remember Xena: Warrior Princess or Hercules, you might remember these dudes–er horse guys, or whatever.

Orphanofwar_Centaurs

Not bad special effects for their time … considering Xena had some of the best–and worst–CGI I’ve ever seen.

But alas, I will not be using CGI or green screens. I will be doing this the old fashioned way.

wiggins

Between Google, YouTube, forums, Pinterest, and all other forms of social media, I found a lot of pictures of finished centaur costumes … but very little on the step-by-step process.

So it seems no one wants to share their methods. No problem.

If you’re interested in making a centaur costume (or just want to see how mine turns out), keep in touch with me via Facebook, twitter, and my blog for tutorials, production updates, as well as reveals of the finished project.

Allow me to be your “Centaur Mentor.”

Next post–building the skeleton.

untitled

From Chic to Geek: Nerd’n It Up At Kokomo Con

Standard
Connecting at Kokomo-Com

Connecting at Kokomo-Con

One hundred years is a mere blink in the life of an elf, and Saturday was a mere blink for me. I’m so sad Kokomo-Con is over. If you follow my blog, my sister’s blog, her twitter account or my twitter account, you know we’re a little crazy about The Hobbit. If you saw us at Kokomo-Con, you might just think we’re plain crazy.

How to do like my Pace face?

How do you  like my Pace face?

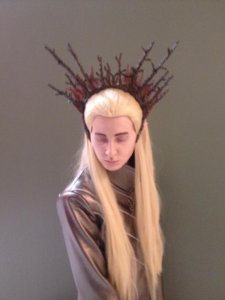
This was our first, and hopefully not our last, cosplay. I was the King of Mirkwood, Thranduil; my sister was Tauriel; and my son was Legolas. In preparation for this event, we ordered costumes, painted latex ears, watched makeup tutorials, and made a crown out of wire and hot glue–it was actually very simple to make believe it or not.

use this oen

My sister getting into character

I think we looked a lot like the characters from Peter Jackson’s adaptation–good enough to be stunt doubles perhaps. Personally, not only was I a convincing Thranduil, but I think I was a rather convincing man. I had a few people tell me I looked like Lee Pace. What do you think? And kudos to my sister, working that red hair. Not to mention my son who was the cutest little Legolas ever!

Kokomo-Con was a lot of fun, which is a gross understatement. There were some great vendors, artist, special guest, events, and, of course, excellent costumes. We were the only ones from Middle Earth, but there were plenty of people from the Star Wars and Marvel universe. Not to mention a few Disney Princesses.

The King of Mirkwood with the Queen of Ice and Snow

The King of Mirkwood with the Queen of Ice and Snow

For those of you who follow my blog for writing content, you might ask, what does this have to do with writing? To be honest, part of the reason we went to the con was to check it out as a possible marketing opportunity. Several of the vendors were selling comic books, paintings, and other media comparable to novels. Booth rental at this event is surprisingly affordable, and with more than 1,500 people walking through the doors, this seems like a great opportunity to make a few sales or at least gain some exposure with our target audience.

storm trooperI think a comic-con is a great place for fantasy writers to connect with potential readers. Fantasy fans travel for miles to shop the booths or dress up as their favorite characters. I think it’s safe to assume someone dressed as Harry Potter or Legolas would be a possible reader. Check to see if you have a local con in your hometown. My sister and I gained several twitter followers from the event. Who knows, they could be future readers. Her book is scheduled to debut this January, so we’ll probably rent a booth at Kokomo-Con 2015. I can’t wait.

Captain of the Guard with  Captain Jack

Captain of the Guard with Captain Jack

So who did we meet at Kokomo-Con? Well, I bumped into a surprising number of people I already knew–that I recognized anyway. I met a few fans of The Hobbit trilogy. Apparently they do exist. I met Darth Vader, Obi wan, Elsa, Merida, Beast (two of them), and Gambit.

Winners of Best Group

Winners of Best Group

Aside from gaining some twitter followers, we walked away with a monetary reward as well. First place for Best Group Costume went to the Mirkwood Elves. Not too bad for our first cosplay. I’ll use my share of the winnings to have my costume dry-cleaned and fix my broken zipper.

It was so much fun getting to be the Elf King.I have to say, I miss my long, blond hair–and my crown. Now that Kokomo-Con is over, it’s back to selling insurance and writing.